 Do you have an abundance of cabbage, daikon, cucumbers, or beets from your garden or CSA share? Do you have memories of pickles and sauerkraut bubbling away in a crock in your grandparents’ cellar? Would you like to recreate these in your own kitchen? If you’re brand new to fermentation, you are in the right place! Here is our two-part guide to get you started experimenting with this traditional fermentation technique for preserving vegetables and creating delicious, fermented flavors! In this post we’ll take you step by step through 2 different methods for fermenting vegetables, and in part 2, we’ll talk about developing recipes.
Before we get started, maybe you’re wondering, “what is fermentation, anyway?” In short, fermentation is a process of transforming food by creating an environment where beneficial bacteria can thrive. When fermenting vegetables, we mainly work with a broad category called lactic acid bacteria. They exist naturally on the surface of fresh vegetables (and in many other places too – like our skin, in healthy soil, etc.). The key to a robust fermentation is giving the lactic acid bacteria a warm, slightly salty, and anaerobic (no access to oxygen) environment. We’ll take you through that process below. For more information on fermentation, see a list of resources at the bottom of this post.
 For these recipes, you will need:
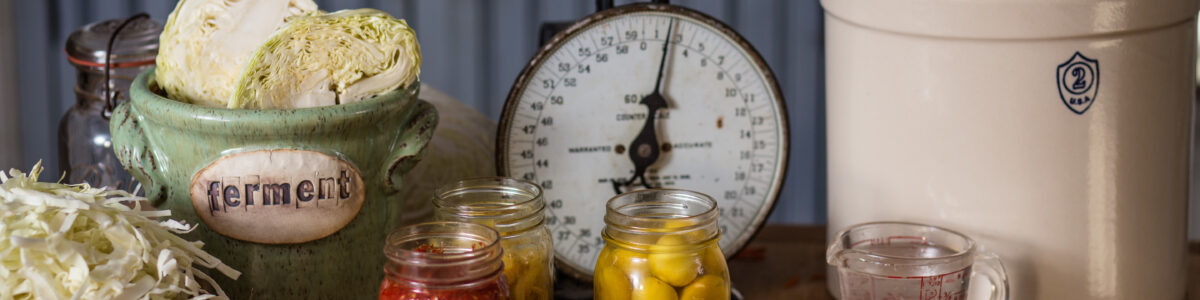
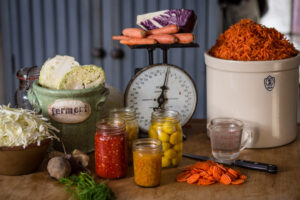
Simple gear:
- Cutting board and knife
- Kitchen scale
- Mixing bowl
- Measuring spoons
- Liquid measuring cup
- Clean Pint glass jars and lids. You can also use larger jars or crocks (measure the volume and scale up the recipes as needed).
- Optional: food processor or mandolin for slicing.

Vegetables: no more than 1 pound for each pint jar (less for the brined method)
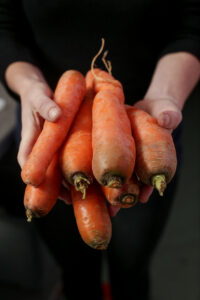
- Many vegetables can be fermented: cabbage, carrots, cucumbers, radishes, onions, beets, cauliflower, and so many more! It is best to use fresh, local, and organic vegetables. This will ensure that plenty of fermenting microbes are present.
Herbs and spices: 1 tablespoon fresh herbs or 1 teaspoon dried herbs or spices.
- Completely optional, but fun to experiment with! These amounts are a starting point, but you may want to use more or less, depending on what you are working with.
Non-iodized salt: Iodine is anti-microbial and will inhibit the fermentation.
- Sea salt, kosher salt, and pickling salt are all ok to use. Best if free from additives.
Filtered water (using any home filtration system)
- If you have no filtration system and your tap water is heavily chlorinated, simply boil the water it and cool to room temperature before using it. Heavy chlorination may inhibit fermentation, but boiling releases it as vapor.
Prep: Brine Method
This method mixes salt and water to make the brine for a ferment of coarsely chopped or whole vegetables. The brining method is a great way to ferment veggies like salad radishes, spring carrots, snap or snow peas, beets, and cucumbers. If you want to scale up this recipe for a larger batch, use this ratio:
1 1/2 teaspoons salt : 1 pint water+vegetables.
- Choose your combination of vegetables, herbs, and spices to ferment (see part 2 for recipe suggestions).
- Coarsely chop your vegetables to yield about 2 cups of cubes, coins, or matchsticks for each pint jar. Or leave them whole if they are tender and smaller than your little finger.
- Place the veggies along with any herbs or spices in the jar, leaving an inch of headspace at the top.
- In a separate jar, mix 1 1/2 teaspoons of salt with 1/2 cup of water until the salt completely dissolves.
- Add the water and salt mixture to the jar of sliced veggies, then top off the jar with more water, leaving 3/4 inch of headspace. Make sure all your vegetables are below the brine.
- Screw the lid on loosely. Shake the jar gently to make sure the salt is evenly distributed.
- Put your jar in a warm (66-72’ F) place to ferment. Put a plate or tray under your jar as they often leak a little in the first week of fermenting.
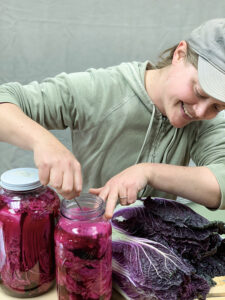
Prep: Dry-Salting Method
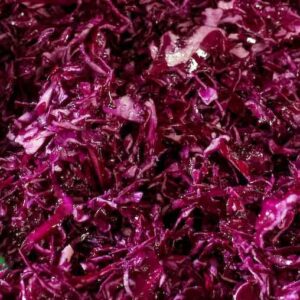
This method is best for shredded veggies like cabbage or carrots. Mixing the salt directly into freshly shredded vegetables will draw our their water. Have you ever heard the saying ‘A pint is a pound the world ‘round’? Believe it or not about a pound of shredded/thinly sliced vegetables will perfectly fill a pint jar! If you want to scale up this recipe for a larger batch, use this ratio:
1 1/2 teaspoons salt : 1 pound (16 oz.) ingredients
- Choose your combination of vegetables, fresh herbs, and dry spices to ferment (see part 2 for recipe suggestions).
- Finely slice or shred your vegetables with a knife, food processor, or mandolin.
- Place the mixing bowl on the kitchen scale and tare the weight. Add 1 1/2 teaspoons salt and fresh herbs or spices. Then add your sliced vegetables until the total weight is 16 oz.
- Mix the salt throughly into the vegetables, herbs, and spices. Let this sit for at least 15 minutes to allow the salt to draw out juices from the veggies as brine. The vegetables will also soften during this process.
- Mix the salted vegetables once more and then pack tightly into the jar leaving 3/4 inch head space. Press down firmly! It should all fit, though you might have a small amount leftover and that’s fine. Pour any brine from the bottom of the bowl on top of the mixture and press the vegetables down until they are submerged. Your vegetables should be covered by the brine. If your mixture is dry, it’s OK to add a tablespoon or two of water.
- Screw the lid on loosely.
- Put your jar in a warm (66-72’ F) place to ferment. Put a plate or a tray under your jar as they often leak a little in the first week of fermenting.
Checking and Tasting Your Ferments

Check on your fermenting veggies daily. Within a day or two you should notice pressure starting to build up in the jar. Once or twice a day, open the lid slowly to release the pressure. You may need to do this over the sink if there’s a lot of pressure, but try not to lose much of the liquid. By the end of the first week, you likely won’t need to “burp” the jars anymore. If the vegetable solids rise above the brine at any point, push them down gently with a clean utensil. Submerging your vegetables in the brine protects the ferment from yeasts and molds, which need oxygen to grow. If you are fermenting in a larger crock or jar, you may need to skim off any mold that grows on the top surface of the brine.
Start tasting your ferment after about a week. As it ferments, the raw vegetable flavor will fade and a sour flavor will become stronger. The texture of the vegetable will also soften with longer fermentation. If you still taste the raw vegetable, try letting it ferment for a few more days and then try it again. When you like the taste and texture, call it done! Putting your ferment in the fridge will slow the fermentation and preserve the taste and texture for many weeks or even months.
How do I Know if my Ferment is Safe to Eat?
- If your ferment was noticeably active in the first few days (bubbly and producing lots of gas), that’s a strong sign. A vigorous fermentation means the lactic acid bacteria are happy and preserving the food.
- You might also notice a whiteish, cloudy substance gathering at the bottom of the jar or in the brine. This is a natural by-product of fermentation and is totally safe and normal.
- Problems like mold or yeast usually occur on the surface of the ferment where it comes into contact with the air. If you notice a little white mold or a darker top layer with a sweet yeasty smell, you can scrape it off and discard the top layer until the ferment looks fresh and smells pleasantly sour.
- If it smells good and appetizing to you, try a small bite. If it tastes pleasantly sour, then it is safe to eat!
Fermentation Resources and Inspiration
The Art of Fermentation by Sandor Katz (2012, Chelsea Green)
The Pickled Pantry by Andrea Chesman (2012, Storey)
Fiery Ferments by Kirsten & Christopher Shockey (2017, Storey)
Fermented Vegetables by Kirsten & Christopher Shockey (2014, Storey)
Cultured Foods for Your Kitchen by Leda Scheintaub (2014, Rizzoli)
Recipes from the Herbalists Kitchen by Brittany Wood Nickerson (2017, Storey)
How to Ferment Vegetables by CityHomesteads.com